When homeowners work through their room-by-room moving plan, the craft room almost always gets underestimated — but knowing how to pack and move a craft room the right way can save you from ruined fabric bolts, shattered glass beads, tangled thread spools, bent frames, and a moving day derailed by a thousand tiny loose pieces scattered across the truck floor. A craft room is deceptively demanding: it combines sharp tools, liquid supplies that will spill without warning, delicate materials in open or semi-open storage, and expensive specialty equipment that was never designed with relocation in mind.
Whether you are relocating across Auburn or moving to an entirely new city, this guide walks you through every step of packing and moving your craft room safely and efficiently. When you are ready to leave the hard work to the professionals, call Wise Guys Moving at (334) 610-1593 or get a free moving quote today.
The craft room presents a category of moving challenges that are entirely different from any other space in the home. Unlike the home office — where the primary concern is electronics and paperwork — or the kitchen — where appliances and dishware dominate the risk profile — the craft room combines sharp instruments, liquid adhesives and paints, fragile materials stored in open bins, and large specialty machines into one uniquely complex environment.
Think about what a typical craft room actually contains: a sewing machine or serger, a cutting plotter or die-cut machine, a heat press or embossing tool, rolls of fabric and vinyl, yarn bins, ribbon spools, paint bottles and ink pads, glue guns, scissors and rotary cutters, stamp collections, scrapbook paper stacks, bead and button organizers, embroidery hoops, canvas frames, and storage systems full of loose small items. Each of these categories carries its own risk. A glue gun left in a box with fabric will bond to it under heat in the moving truck. Liquid acrylic paint bottles with unsecured caps will leak and stain everything around them. Loose beads that escape their containers will scatter and become a slip hazard. Sewing machine needles left in a machine without being secured can bend or break during transport.
A rushed craft room pack almost always produces the same bad outcomes: damaged equipment, ruined supplies, lost small pieces, and tools that arrive bent, broken, or hopelessly tangled. Plan to begin packing your craft room at least three to four days before moving day — it takes significantly longer than most homeowners anticipate.
Before you wrap a single spool or seal a single paint bottle, the most valuable thing you can do is take a full inventory of your craft room and make honest decisions about what is actually worth moving. Craft rooms accumulate supplies, half-finished projects, duplicate tools, and materials purchased for projects that never happened. Moving day is the ideal moment to reset rather than simply relocate the same excess.
One of the most practical distinctions you can make is between consumable supplies — paints, adhesives, fabric scraps, paper — and durable equipment like your sewing machine, cutting plotter, or heat press. Consumables should be evaluated ruthlessly: if a paint bottle is less than a quarter full, dried out, or a color you have not touched in two years, dispose of it rather than packing it. Partial bottles of glue, old ink pads, and dried-out markers are rarely worth the weight and leak risk they introduce into your moving boxes.
Durable equipment, on the other hand, warrants careful wrapping, original boxes where available, and — in some cases — professional handling. If you no longer have the original packaging for a large cutting machine or sewing machine, source appropriately sized boxes and packing foam well in advance of your move date.
The crafting community has a strong culture of "destashing" — passing unused supplies on to other crafters rather than discarding them. Consider listing surplus fabric, yarn, and tools in local crafting groups or donating to a school, community center, or arts program. Not only does this reduce your moving load, it also gets supplies into the hands of people who will actually use them.
Liquid supplies are the single highest-risk category in any craft room move. Paint bottles, mod podge, fabric glue, rubber cement, resin components, and ink refills all have the potential to leak, spill, and permanently damage everything they touch. Treat every liquid container as a potential hazard and pack accordingly.
For every liquid container, unscrew the cap, place a small square of plastic wrap over the opening, and then screw the cap back on over the plastic. This creates a secondary seal that will hold even if the cap works loose during transport. For bottles with flip-top or squeeze caps, apply a strip of painter's tape over the opening before sealing with plastic wrap.
Pack all liquid containers upright in a single layer inside a plastic storage bin — not a cardboard box. If a leak occurs inside a plastic bin, it is contained. If a leak occurs inside a cardboard box, it will saturate the box, destroy the contents, and potentially damage other boxes stacked nearby on the truck. Label the bin clearly: LIQUIDS — THIS SIDE UP.
Some craft room liquids are classified as hazardous materials and should not be transported in a moving truck under any circumstances. These include aerosol spray paints, spray adhesives, certain resin hardeners, and flammable solvents like rubber cement thinner. Check the label of any aerosol or chemical product for flammability warnings. If a product carries a flammability warning, dispose of it through your municipality's household hazardous waste program rather than attempting to move it. Your moving company may not be able to transport these items, and attempting to do so creates a serious safety risk.
Small loose items — beads, buttons, sequins, eyelets, brads, pins, needles, and embellishments — are among the most frustrating elements of any craft room move. A single overturned container of seed beads or mixed buttons can mean hours of cleanup and permanent loss of materials you cannot easily replace.
Do not transfer small loose items from their existing storage containers unless absolutely necessary. If your beads are already sorted in compartmented boxes or screw-top jars, secure the lids with rubber bands or tape and pack those containers together in a single box, cushioned with packing paper. If items are stored in open trays or unsecured bins, transfer them into zip-lock bags — one category per bag — and label each bag clearly before placing them inside a larger box.
Never pack loose pins, needles, or rotary cutter blades in soft-sided packaging. These sharp items must go into rigid containers — their original cases if available, or small plastic containers with secure lids — before being packed inside a larger box. Clearly label any box containing sharp tools so that whoever opens it on moving day is forewarned.
Thread spools, yarn skeins, and ribbon rolls will tangle aggressively if packed loose together. Place thread spools in a zip-lock bag with the thread end tucked back onto the spool before sealing. Bundle yarn skeins individually with a loose slip of paper or a small rubber band around the skein — not so tight that it compresses the fibers. Roll ribbon tightly and secure the end with a small piece of tape before placing rolls in a bag or box.
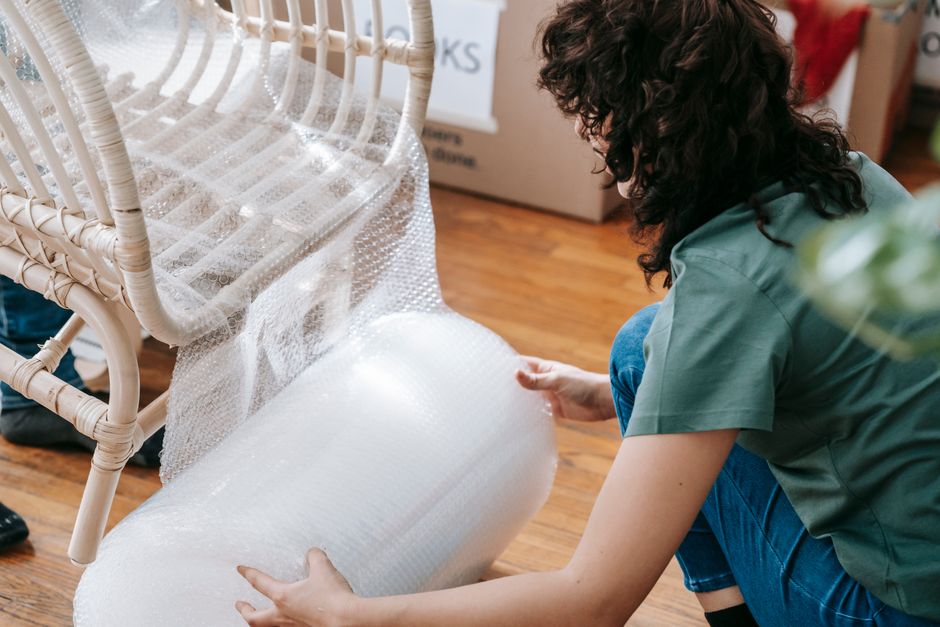
Large specialty machines — sewing machines, sergers, cutting plotters, embroidery machines, heat presses, and laminators — represent some of the most valuable items in a craft room. Many of these machines cost hundreds or even thousands of dollars to replace, and they require specific preparation before transport.
Before packing a sewing machine, remove the needle and store it in a pinchushion or a clearly labeled rigid container — never leave a needle in the machine during transport. Remove any bobbins and store them in a small bag. Secure the presser foot and lower it to the down position. Wind the power cord neatly and secure it with a velcro tie or a loosely wound rubber band — never wrap it tightly around the machine. If the original box and foam inserts are available, use them. If not, wrap the machine in moving blankets and place it in a well-padded box sized as close to the machine's dimensions as possible. Fill any void space with crumpled packing paper so the machine cannot shift during transit.
Machines like electronic cutting plotters have delicate carriages and cutting heads that can be damaged by vibration if not properly immobilized. Consult your machine's manual for transport instructions — many manufacturers specify how to lock or secure the carriage before moving. Remove any mats, blades, and accessories and pack them separately. Store the machine in its original box when possible; if the original box is not available, contact the manufacturer or a craft retailer about sourcing replacement packaging.
Paper stacks, cardstock, fabric bolts, vinyl rolls, and canvas panels all share a common vulnerability: they bend, crease, and warp easily when packed improperly. These materials are best packed flat in wide, shallow boxes or rolled and stored in tubes — never folded unless they were originally sold folded.
Scrapbook paper, cardstock pads, and sticker sheets should be packed flat, stacked no more than a few inches deep in a wide box. Place a sheet of clean packing paper between different paper types to prevent ink transfer or surface scratching. Do not overfill paper boxes — paper is heavier than it looks, and an overloaded box creates a back injury risk for movers and a structural failure risk for the box itself.
Small fabric cuts and fat quarters can be folded and packed in a box like clothing. Longer fabric bolts and full rolls of vinyl or heat-transfer material are best rolled loosely around a cardboard tube and secured with a rubber band, then placed in a box or garment box standing upright. Avoid stacking heavy items on top of fabric rolls, which can compress the material and leave permanent creases.
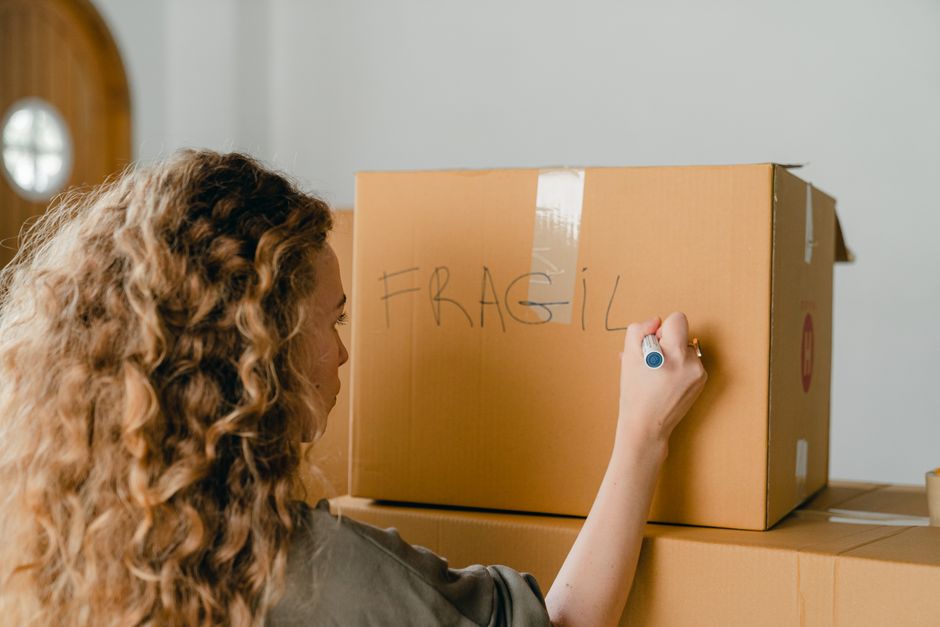
On moving day itself, load craft room boxes with care. Because so many items are fragile, liquid-filled, or sharp, craft room boxes should be loaded last onto the truck and positioned so they will not have heavy items stacked on top of them. Mark every box clearly: CRAFT ROOM — FRAGILE on at least two sides and the top. Liquid containers in their plastic bins should be loaded upright and positioned so they cannot tip.
If you are working with a professional moving team, walk them through the craft room before loading begins. Point out your machines, your liquid bins, and any boxes containing sharp tools. A brief two-minute conversation at the start of the day prevents the most common craft room moving accidents.
For a seamless experience on moving day, get a free moving quote from Wise Guys Moving and let our experienced team handle the heavy lifting while you focus on your next creative space.
Plan to begin packing your craft room at least three to four days before moving day. Craft rooms contain a high volume of small, loose, and fragile items that take much longer to pack safely than most homeowners expect. Starting early gives you time to sort supplies, source appropriate containers, dispose of hazardous liquids properly, and pack machines with the care they require.
In most cases, no. Aerosol spray paints, spray adhesives, and flammable solvents are classified as hazardous materials and should not be transported in a moving truck. Check the label of any aerosol or chemical product for flammability warnings and dispose of flagged items through your municipality's household hazardous waste program before moving day. Contact your moving company directly if you have questions about specific items.
Remove the needle and any bobbins before packing, and store them separately in clearly labeled containers. Secure the presser foot and lower it to the down position. Wrap the power cord neatly without winding it tightly around the machine. Pack the machine in its original box and foam inserts if available. If the original packaging is gone, wrap the machine in moving blankets, place it in a snug-fitting box, and fill all void space with packing paper so the machine cannot shift during transit.
Keep small loose items in their existing sorted containers whenever possible, securing lids with rubber bands or tape. If items are in open trays or unsecured bins, transfer them into labeled zip-lock bags — one category per bag — before placing the bags inside a larger box. Never pack loose sharp items like pins or needles in soft packaging; always use rigid containers with secure lids and label those boxes clearly.
Unscrew the cap of each liquid container, place a small square of plastic wrap over the opening, and screw the cap back on to create a secondary seal. For flip-top or squeeze caps, add a strip of painter's tape over the opening before applying the plastic wrap. Pack all liquid containers upright in a single layer inside a plastic storage bin — not a cardboard box — and label the bin clearly as LIQUIDS — THIS SIDE UP. A plastic bin will contain any leaks that occur during transport.