When homeowners work through their room-by-room moving plan, the pantry almost always gets treated as a quick afterthought — but knowing how to pack and move a pantry the right way can save you from shattered glass jars leaking olive oil into a box of pasta, expired canned goods wasting valuable truck space, a spice rack that arrives as a pile of loose lids and mystery powders, and a new kitchen that feels chaotic for months because nothing ever made it back to a logical shelf. The pantry is deceptively demanding: it holds more individual items than almost any room in the house, contains heavy glass and ceramic containers that punish careless packing, and stores food that is subject to temperature, moisture, and spoilage rules that most movers never think about until it is too late.
Whether you are relocating across Auburn or moving to an entirely new city, this guide walks you through every step of packing and moving your pantry safely and efficiently. When you are ready to leave the hard work to the professionals, call Wise Guys Moving at (334) 610-1593 or get a free moving quote today.
The pantry presents a category of moving challenges that are entirely different from any other space in the home. Unlike the living room — where the primary concern is heavy upholstered furniture and entertainment systems — or the garage — where hazardous materials and bulky power tools dominate the risk profile — the pantry combines fragile glass containers, bulky canned goods, perishable food with strict transport limitations, loose dry goods that spill at the first jostle, and shelving infrastructure that may be built-in or freestanding but almost certainly needs to come apart before the truck is loaded.
Think about what a typical pantry actually contains: rows of glass pasta sauce jars, canned vegetables and soups stacked two or three deep, bags of flour, sugar, rice, and dried beans that were never resealed properly, a spice collection with dozens of small bottles, bottles of cooking oil and vinegar that tip easily, boxes of cereal and crackers that crumble under pressure, condiments and sauces that belong in the refrigerator the moment the power goes back on, and shelf-stable beverages ranging from bottled water to wine. Each of these categories carries its own specific risk in transit. Glass jars shatter under lateral pressure. Canned goods are heavy enough to crush soft-sided boxes if stacked incorrectly. Dry goods in opened bags leak through even the smallest gap. Cooking oils create permanent stains if their lids are not taped shut. And condiments that are not refrigerated during a long-distance move can spoil and become a food-safety concern before you ever unpack them.
Plan to dedicate at minimum a full half-day exclusively to the pantry — and if yours is a walk-in style with floor-to-ceiling shelving and a significant inventory, budget a full day and begin the process at least two weeks before moving day so you can use up perishables rather than discard them.
Before you pack a single box, take a complete inventory of everything in the pantry and make honest decisions about what is worth transporting, what can be consumed before the move, what can be donated to a local food bank, and what has simply expired and needs to go.
Moving a pantry full of expired food is one of the most common and avoidable mistakes homeowners make. Canned goods, dried spices, baking supplies, and condiments all have shelf lives, and many items tucked at the back of a pantry shelf have already passed theirs. Pull everything out, check every date, and make a firm rule: if it is expired or within a month of expiring, it does not get packed. This is also the right time to discard anything that has been opened and partially used but realistically will never be finished — the jar with one tablespoon of peanut butter, the box of crackers with a sleeve and a half remaining, the bag of quinoa that has been sitting since last year.
Once you have culled the pantry down to what you genuinely want in your new home, sort the remaining items into three categories: shelf-stable and safe to pack in boxes, refrigerator-dependent and needing careful handling or replacement, and items that should be used up in meals before moving day. Shelf-stable items — sealed canned goods, unopened dry goods, factory-sealed condiments, bottled beverages — can be packed and moved normally. Refrigerator-dependent items — open bottles of salad dressing, mayonnaise, fermented sauces — need a plan. On a local move, they can travel in a well-sealed cooler. On a long-distance move, it is often safer and more cost-effective to discard perishables and restock at your destination.
Any unexpired, sealed, shelf-stable food that you have decided not to move is a donation opportunity. Local food banks and community pantries in the Auburn area welcome canned goods and packaged food. Donating rather than discarding keeps usable food out of the landfill and reduces the weight and volume you are paying to transport — a meaningful saving when your moving estimate is based partly on truck weight.
Packing a pantry requires a different supply set than packing a bedroom or home office. The combination of heavy items, glass containers, and loose-fitting lids means that standard packing techniques need to be reinforced with the right materials.
Use small and medium boxes exclusively for pantry items. A large box filled with canned goods can easily exceed fifty pounds — far beyond what a single person can lift safely and beyond the weight threshold that causes box bottoms to fail. Small boxes in the twelve-inch cube range are ideal for canned goods and glass jars. Medium boxes work well for lighter dry goods like cereal, crackers, and pasta. Dish pack boxes with interior cardboard inserts are strongly recommended for glass jars, bottles of cooking oil, and wine or specialty beverage bottles. The divider inserts keep glass from contacting glass, which is where the majority of breakage occurs.
Every glass jar and every bottle should be individually wrapped in unprinted packing paper before it goes into a box. Bubble wrap provides an additional layer of protection for items that are particularly fragile or valuable. Do not use newspaper for direct contact with food containers — the ink can transfer to labels, making it difficult to identify contents, and can potentially contaminate containers with broken seals.
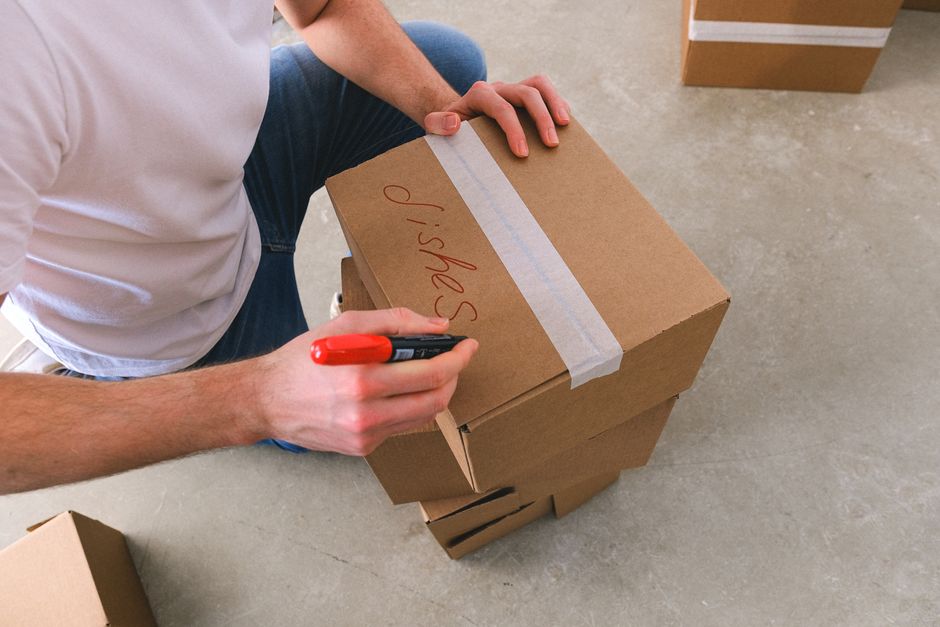
Every box coming out of the pantry should be double-taped on the bottom — run tape in both directions across the seam to create a reinforced cross pattern. Label every box clearly on at least two sides with the destination room and a brief content description. A box labeled "Pantry — Canned Goods, Heavy" tells the movers exactly where it goes and exactly how to handle it. A box labeled only "Kitchen" creates confusion and risks being stacked under boxes it was never meant to support.
The most efficient way to pack a pantry is category by category rather than shelf by shelf. Packing shelf by shelf tends to mix heavy and light items in the same box, creates weight imbalances, and results in boxes that are impossible to unpack logically at the destination. Category packing keeps like items together, makes weight management easier, and allows you to unpack the new pantry in a systematic way.
Pack canned goods snugly in small boxes with the heaviest cans on the bottom and lighter items on top. Fill any gaps with crumpled packing paper to prevent cans from shifting and rolling during transit. Do not stack canned good boxes more than two high on the truck — their weight creates compressive force on boxes below them. Tape box bottoms with double reinforcement and mark every box as "Heavy."
Each glass jar and bottle gets its own wrap of packing paper before going into a dish pack box with divider inserts. Stand bottles upright whenever possible — bottles packed on their sides are more likely to leak if lids are not perfectly sealed. Before wrapping any open or partially used bottle, tape the lid shut with packing tape as a secondary seal. Check cooking oil, vinegar, soy sauce, and any other liquid that would stain or create an odor if it leaked. Fill the top of each box with crumpled paper to prevent movement and mark the box "Fragile — Glass."
Flour, sugar, rice, dried beans, oats, and similar dry goods present a specific challenge: the bags they come in are rarely resealable, and even a small tear can result in the contents spreading through a moving box. For any opened bag of dry goods, the safest approach is to transfer the contents to a zip-lock bag, remove as much air as possible, and then seal the zip-lock bag inside the original packaging for identification. Pack dry goods in medium boxes, keeping the total weight manageable, and fill gaps with packing paper to prevent bags from shifting.
A spice collection is one of the most tedious parts of packing a pantry but also one of the most satisfying to manage well. Check every spice bottle for a secure lid before packing. Group spices together in a medium box, wrapping each bottle individually in packing paper. Place the smallest bottles in the center of the box surrounded by larger bottles on the outside, which reduces the risk of tiny bottles rolling free. A layer of bubble wrap on the bottom of the box adds cushioning. Label the box "Spices — Fragile, This Side Up" and keep it separate from the heavy canned goods boxes.
If your pantry uses freestanding wire shelving, a standalone shelving unit, or pantry organizers like drawer inserts, lazy Susans, or tiered risers, these all need to be packed separately from the food. Disassemble wire shelving and wrap each section in moving blankets or stretch wrap to prevent scratches and bent corners. Small organizers like tiered risers and lazy Susans can be wrapped in packing paper and grouped in a medium box labeled "Pantry Organization." Keep the hardware from any disassembled shelving in a clearly labeled zip-lock bag taped directly to the corresponding shelf section.
Even perfectly packed pantry boxes can be damaged if they are loaded incorrectly onto the truck. A few loading principles will protect everything you have carefully prepared.
Always load pantry boxes last if they are small and heavy — heavy small boxes do not need to go on the floor of the truck under large furniture, which risks compression damage. Place canned-good boxes on the truck floor along the walls where they will not be knocked by passing furniture and where they serve as stable ballast. Fragile glass boxes should go on a flat, stable surface with nothing stacked on top. Keep pantry boxes away from any items that could leak or crush them.
If you are moving locally — across Auburn or to a nearby community — your pantry items will almost certainly arrive in good condition as long as they are packed well. If you are moving long-distance, temperature becomes an additional consideration. Pantry staples like cooking oil and chocolate can be affected by high heat inside a moving truck during summer months. If you are moving during a hot season, discuss climate concerns with your moving company and consider whether high-value pantry items should travel in your personal vehicle with air conditioning rather than in the truck.
Arrival day is the moment your pantry packing strategy either pays off or falls apart. If you labeled every box clearly and packed by category, unpacking the new pantry is straightforward. If you did not, it becomes a days-long scavenger hunt.
Begin by placing all pantry boxes in the kitchen area before unpacking anything else. Clean the new pantry shelves before the first item goes in — a quick wipe-down removes dust, paint residue, or the previous owner's spills. Then unpack by category, starting with the heaviest items on the lowest shelves and working upward. Canned goods on the bottom, dry goods in the middle, spices and small bottles at eye level or on door-mounted racks, and infrequently used items on the highest shelves.
Use the new pantry as an opportunity to establish an organization system that works better than the one you left behind. Group items by cooking category — baking ingredients together, grains together, canned proteins together — and create clear zones so every household member knows where to find and return each item. A well-organized new pantry makes the entire kitchen feel more settled and functional from the very first meal you cook.
There is no shame in recognizing that a pantry — particularly a large walk-in pantry with significant inventory, floor-to-ceiling shelving, and a combination of fragile glass items and heavy canned goods — is more than most households want to manage alone on top of everything else a move demands. The professional team at Wise Guys Moving has helped Auburn homeowners pack and transport pantries of every size, and we know exactly how to keep glass jars intact, heavy boxes managed, and your food inventory organized for a smooth unpack.
If you are approaching a move and the pantry is already giving you anxiety, call us at (334) 610-1593 or get a free moving quote today. We will take the pantry — and every other room — off your list so you can focus on everything else that comes with starting fresh in a new home.
It depends on the distance and the type of food. For a local move across Auburn or to a nearby city, it is generally worth packing sealed, shelf-stable items like canned goods, sealed dry goods, and bottled sauces. For a long-distance move, the cost of transporting heavy canned goods — combined with the risk of spoilage, breakage, and temperature damage — often makes it more practical to donate unexpired pantry staples to a local food bank and restock at the destination. Perishable or refrigerator-dependent items like open condiments, dairy-based sauces, and anything requiring refrigeration should almost always be discarded or consumed before moving day rather than transported.
Small boxes in the twelve-inch cube range are ideal for canned goods because they limit the total weight per box and reduce the risk of the bottom failing under heavy load. Avoid using large boxes for canned goods — a fully loaded large box of cans can easily exceed fifty pounds, which is unsafe for lifting and puts stress on the box itself. Double-tape the bottom of every canned-good box in a cross pattern for added reinforcement, fill any gaps with crumpled packing paper to stop cans from rolling, and label each box clearly as 'Heavy' so movers know to handle it with care and avoid stacking it under other boxes.
Before packing any bottle of cooking oil, vinegar, soy sauce, or other liquid condiment, tape the lid shut with packing tape as a secondary seal — even if the lid appears tight. Wrap each bottle individually in packing paper and stand bottles upright in the box rather than laying them on their sides, which increases the risk of leaking. Use dish pack boxes with cardboard divider inserts to keep glass bottles separated and prevent them from contacting each other during transit. Place a layer of bubble wrap on the bottom of the box for cushioning and fill the top with crumpled paper to prevent movement. Mark the box 'Fragile — Liquids, Keep Upright' so movers know to handle it carefully.
Opened bags of dry goods like flour, sugar, rice, oats, and dried beans are one of the trickiest parts of packing a pantry because the bags are rarely truly resealable. The safest approach is to transfer the contents into a heavy-duty zip-lock bag, press out as much air as possible, and seal it tightly. You can then place the zip-lock bag back inside the original packaging for easy identification. Pack these bags in medium boxes with gaps filled by packing paper to prevent shifting, and avoid placing heavy items on top of the same box. If a bag is nearly empty, consider using it up in a meal before moving day rather than packing a partial amount.
For most households, beginning the pantry packing process two to three weeks before moving day is ideal. This timeline gives you enough lead time to actually use up perishables in your regular meal planning rather than discarding them, sort through expiration dates without feeling rushed, make donations of unexpired food you will not transport, and gather the right supplies — dish pack boxes, divider inserts, packing paper, and reinforced tape — before you need them. The actual packing of sealed, shelf-stable items can be done in the week before the move, but the audit, purge, and donation phase benefits from being started early. If your pantry is particularly large or you have a significant inventory of glass jars or specialty items, budget extra time accordingly.

It depends on the distance and the type of food. For a local move across Auburn or to a nearby city, it is generally worth packing sealed, shelf-stable items like canned goods, sealed dry goods, and bottled sauces. For a long-distance move, the cost of transporting heavy canned goods — combined with the risk of spoilage, breakage, and temperature damage — often makes it more practical to donate unexpired pantry staples to a local food bank and restock at the destination. Perishable or refrigerator-dependent items like open condiments, dairy-based sauces, and anything requiring refrigeration should almost always be discarded or consumed before moving day rather than transported.
Small boxes in the twelve-inch cube range are ideal for canned goods because they limit the total weight per box and reduce the risk of the bottom failing under heavy load. Avoid using large boxes for canned goods — a fully loaded large box of cans can easily exceed fifty pounds, which is unsafe for lifting and puts stress on the box itself. Double-tape the bottom of every canned-good box in a cross pattern for added reinforcement, fill any gaps with crumpled packing paper to stop cans from rolling, and label each box clearly as 'Heavy' so movers know to handle it with care and avoid stacking it under other boxes.
Before packing any bottle of cooking oil, vinegar, soy sauce, or other liquid condiment, tape the lid shut with packing tape as a secondary seal — even if the lid appears tight. Wrap each bottle individually in packing paper and stand bottles upright in the box rather than laying them on their sides, which increases the risk of leaking. Use dish pack boxes with cardboard divider inserts to keep glass bottles separated and prevent them from contacting each other during transit. Place a layer of bubble wrap on the bottom of the box for cushioning and fill the top with crumpled paper to prevent movement. Mark the box 'Fragile — Liquids, Keep Upright' so movers know to handle it carefully.
Opened bags of dry goods like flour, sugar, rice, oats, and dried beans are one of the trickiest parts of packing a pantry because the bags are rarely truly resealable. The safest approach is to transfer the contents into a heavy-duty zip-lock bag, press out as much air as possible, and seal it tightly. You can then place the zip-lock bag back inside the original packaging for easy identification. Pack these bags in medium boxes with gaps filled by packing paper to prevent shifting, and avoid placing heavy items on top of the same box. If a bag is nearly empty, consider using it up in a meal before moving day rather than packing a partial amount.
For most households, beginning the pantry packing process two to three weeks before moving day is ideal. This timeline gives you enough lead time to actually use up perishables in your regular meal planning rather than discarding them, sort through expiration dates without feeling rushed, make donations of unexpired food you will not transport, and gather the right supplies — dish pack boxes, divider inserts, packing paper, and reinforced tape — before you need them. The actual packing of sealed, shelf-stable items can be done in the week before the move, but the audit, purge, and donation phase benefits from being started early. If your pantry is particularly large or you have a significant inventory of glass jars or specialty items, budget extra time accordingly.